Authenticated user actions using the EAM interface
Table of contents
- Logging in to the EAM system as anonymous user
- Creating an EAM User manually
- Adding an own EAM account
- Deleting an EAM account in Draft state
Logging in to the EAM system as an anonymous user
An anonymous user is a user yet to be identified in our records, who wishes to login to the EAM system, being the first step in order to become an Authenticated User.
This action describes how to access the HD EAM portal page via the Federal Authentication Service (FAS) and how to have your basic data such as name and niss number validated automatically.
Initial step:
Navigating to the HD EAM Portal page
To log into our Entity Access Management system, you need to navigate to the https://eam.healthdata.be URL.

Logging in with itsme, eID
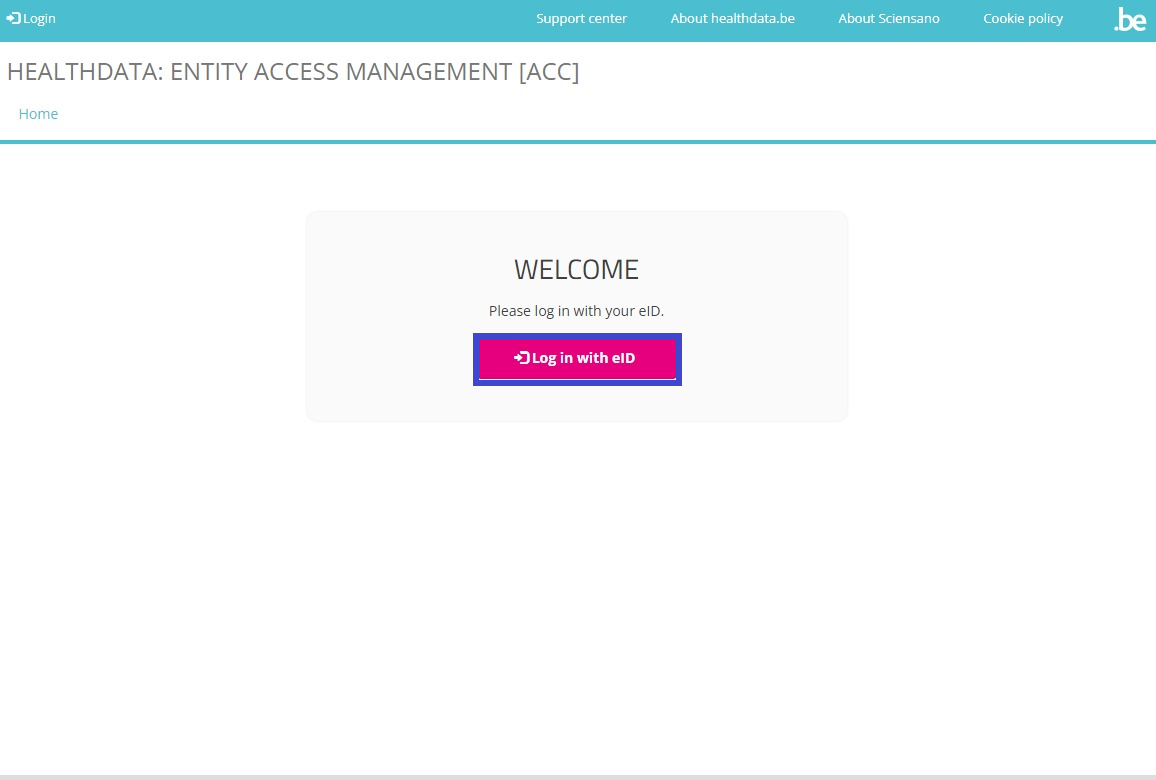
To log into the HD EAM Portal you need to click on the Login button on the top left of your screen.

Then select the Log in with eID button.
You will be redirected to the government's Federal Authentication Service (FAS), where you can log in with multiple digital keys with eID or digital identity.

When selecting the itsme option, you will need to enter your cell phone number.
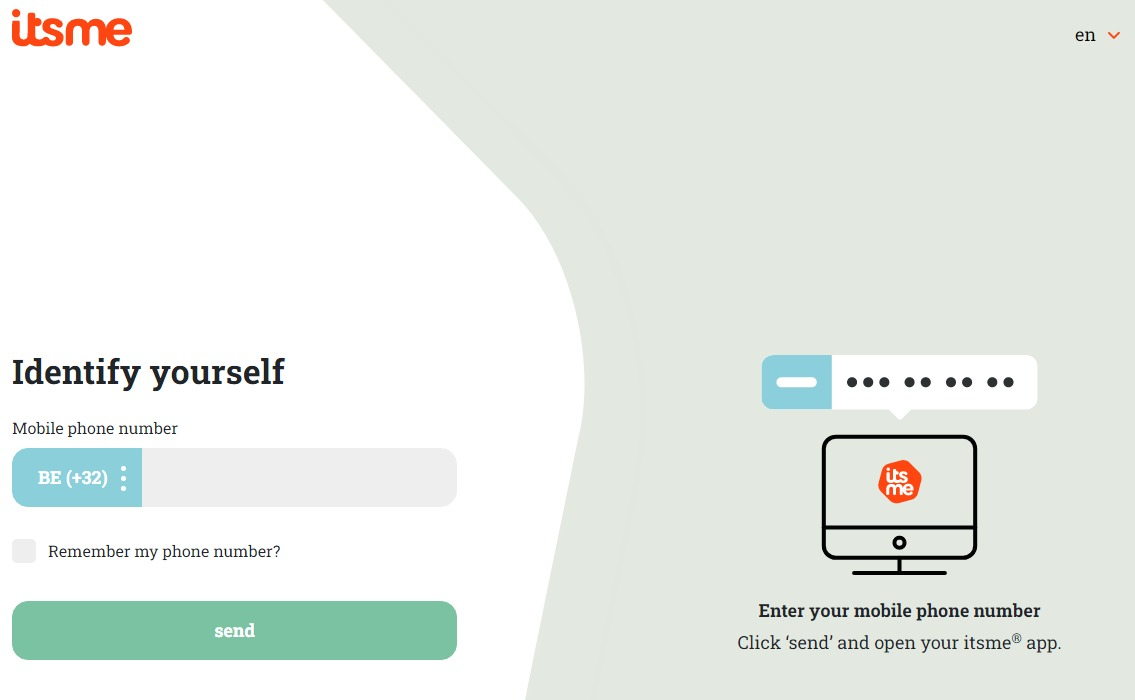
Follow the instructions on your mobile device via the itsme application.

Once the itsme login procedure has been completed, confirm by clicking the green profile validation button ("Profiel bevestigen" or "Confirmer le profil") to log in into the HD EAM system (see image below).
| NL | FR |
 |  |
You are now directed to the EAM portal page which displays the data you have shared by eID, itsme or another digital key.

Return to the User Matrix (recommended)
Creating an EAM User manually
Preceding steps
Completing the user profile and becoming an Authenticated User
The main My Profile screen that opens up after selecting the confirmation button shows the Personal information you have already shared with the EAM system via the Federal Authentication Service (FAS), i.e. your first name, last name and NISS code. And, if available, a NIHDI number.
Below your personal information the Linked accounts window displays an overview of the accounts linked to your profile. You can sort this overview by Account, Email and State. Selection of an account in this window directs you to the management of grants for these accounts, to an overview of accesses to projects and several advanced actions.

Attention:
Upon your first login the Linked accounts section will be of course empty.
With the release of EAM 3.1 the Organisations item has been added to the Personal information section, indicating the organization(s) the user is affiliated with. In this way, users can be traced back and managed by the Access Manager more easily.
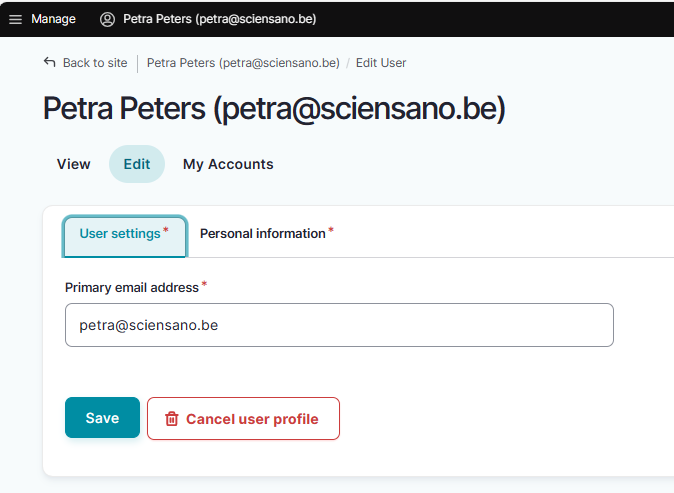
To continue, click on your name and e-mail address on the top left of the screen to toggle a toolbar containing the tabs View profile, Edit profile, My Accounts and Log out.
The View profile tab directs you to the My profile screen.

To complete your profile, select the Edit profile tab and then the underlying tabs User settings and Personal information. Required fields are indicated with a red asterisk.
Select the User settings tab.
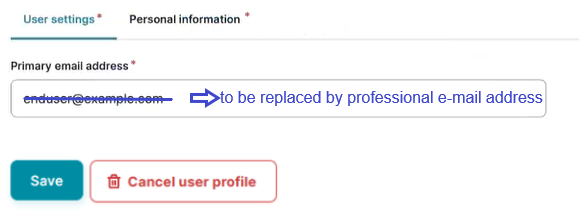
ATTENTION: When logging in for the first time, the User settings tab will feature a primary e-mail address field with a pre-filled default e-mail address, e.g.:

Replace this address with your professional e-mail address. This e-mail address is used to send necessary notifications to you. We recommend you to avoid the use of public e-mail addresses (such as @gmail.com, @hotmail.com, @yahoo.com etc.) for security purposes.
Confirm with the Save button.
The Personal information tab contains pre-populated information such as first name, last name and SSIN in greyed out fields. This information can't be changed. Next to this, you can provide a NIHDI number, or more than one, if applicable.
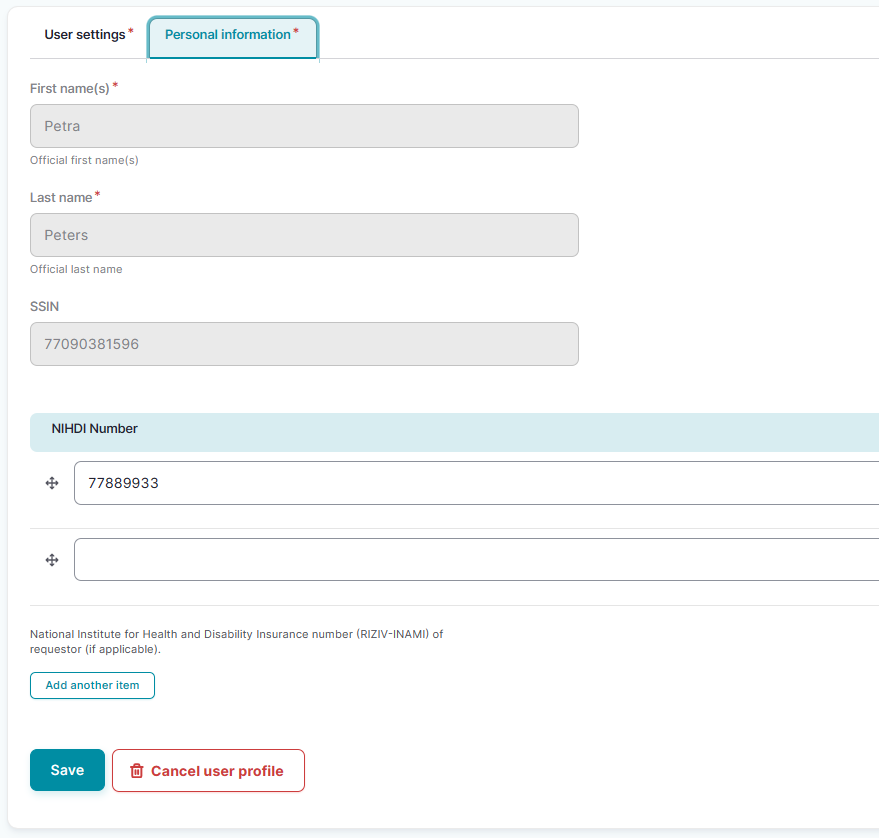
Confirm with the Save button. You have now completed the fields in both User settings and Personal information tabs, which makes you known to the EAM system as an Authenticated User.
Return to the User Matrix (recommended)
Adding an own EAM account
Full tutorial available here
Preceding steps
Adding and provisioning an EAM account
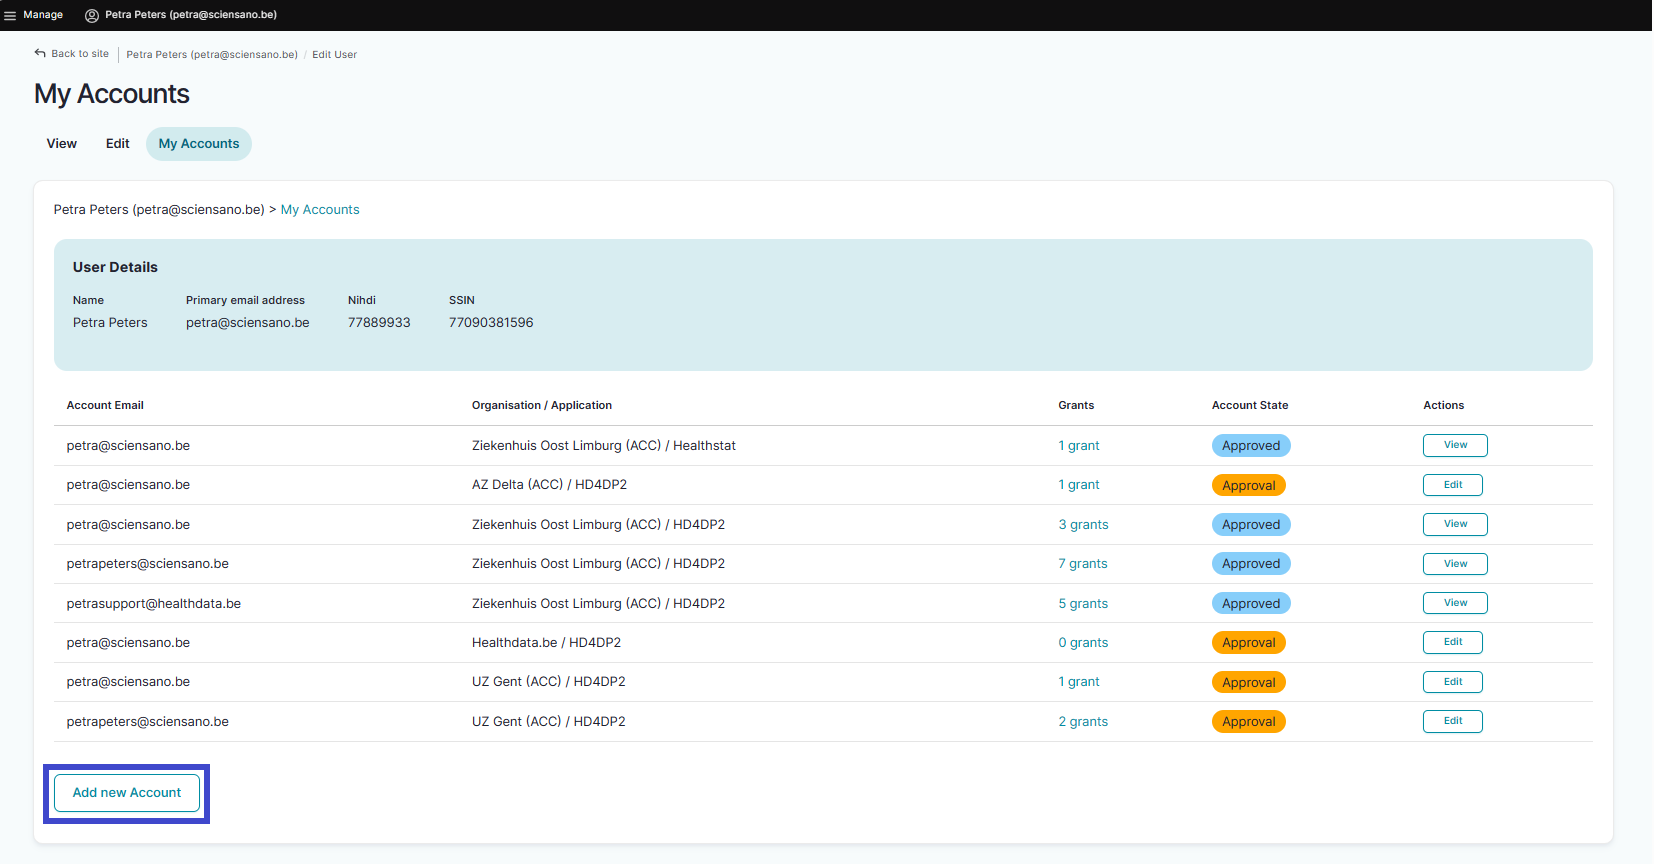
Return to the My Profile page and select the My Accounts tab.

On the My Accounts page your personal information is displayed in the blue User details section, followed by a list of accounts you have created.
To add a new account, click on the Add new Account button at the bottom of the page.
Complete the fields in the Add a new account window with the email address for your organization and select a combination of an organization (availabe in a drop-down list with an auto-completion function as shown below) and an application (HD4DP2, Healthstat ...). This is called provisioning of an account.
Tip: If possible, avoid the use of a public e-mail address such as @gmail.com, @hotmail.com, @yahoo.com etc.

Click on the Save button.
You will be automatically redirected to the My Accounts page that has now been updated with your newly created account added at the bottom of the list. The account has received the status "Draft".

Requesting approval of an account without grants
At this stage you can already request approval of this provisioned account. Therefore, select the Edit button in the Actions column.

Click on the Request approval button.

When you return to the My Accounts page, you will notice that the Account State has changed to Approval (in orange).

The Access Manager will be notified of your request via e-mail. The Access Manager will then need to take appropriate action. This can take multiple hours. Upon confirmation the Account State will change to Approved.
ATTENTION:
An account without grants, even approved, does not give any access to registries in a given HD application. The advantage of having such an account approved, is that you, as a user, will be visible in the Access Manager's display of users within the organization.
If you want to add grants at this stage, go here (HD4DP v2) or here (healthstat.be) for the relevant instructions.
Return to the User Matrix (recommended)
Deleting an EAM account in Draft state
Preceding steps
- Navigating to the HD EAM Portal page
- Completing the user profile and becoming an Authenticated User
- Adding and provisioning an EAM account
Deleting an account

ATTENTION: Once an account approval request has been granted and features the status Approval, the Delete option is not available anymore.

Selecting the Edit button opens the account page for managing grants. If no grants are shown, no grants are to be managed. Added grants can only be viewed.

Once in Approval State, an Authenticated User can't delete the account anymore. You need then to contact your Access Manager for further action, e.g. to disable the account.
Return to the User Matrix (recommended)
This documentation is being updated regularly. We try to provide as correct, complete and clear as possible information on these pages. Nevertheless, if you see anything in the documentation that is not correct, does not match your experience or requires further clarification, please create a support ticket via our portal Jira Service Management or send us an e-mail via support.hd@hda.fgov.be to report this documentation issue. Please do not forget to mention the URL of the page. We will then adjust the documentation as soon as possible. Thank you!