Technical manual of the application HD4DP v2
Technical manual of the application HD4DP v2 Bart.Servaes Wed, 06/19/2024 - 23:57Technical user roles in HD4DP v2
Technical user roles in HD4DP v2IT administrator: An IT administrator has the highest level of all roles and permissions and can:
- log in using Active Director;
- grant access to Local Study Lead, Local Study Associate and Local Study Support;
- select and access all projects;
- create, find, update, delete, send (to healthdata.be, MyCareNet and other destinations) and correct a record using the form.io component;
- create, update, send and correct a record using the API data collection;
- create, update, send and correct a record using CSV upload;
- create and send a MyCareNet record using MyCareNet XML;
- view all records for all projects;
- harvest all records for all projects from the local DWH using the PostgreSQL database.
HD4DP v2 Installation
HD4DP v2 InstallationHD4DP v2.0 Local is an application installed on the infrastructure of the Health Care Organization participating in research projects facilitated by healthdata.be.
The installation of HD4DP v2 Local is executed by the DevOps team of healthdata.be.
Server Installation and Configuration
Installing and configuring the server requires the following actions:
- install and configure the server as described in the article "HD4DP 2.0 Infrastructure instructions";
- complete and return to support.healthdata@sciensano.be the server configuration file "HD4DP v2 Infrastructure Sheet".
The HD4DP v2.0 application is more modular and will support scaling up to meet the requirements of the various data collection projects we facilitate. It will offer several micro-services that will run concurrently on the same machine.
The server should therefore require more resources than the one currently hosting the HD4DP 1.0 application. Furthermore, the resources allocated should be increased. It is therefore on the one hand imperative to use virtualization for the creation of the machine. On the other hand it is also imperative to store files and make regular backups to a file server.
Below we take up our three categories of organizations sending data to healthdata.be and the resources we recommend allocating to their virtual machine:
- “Small”: Small data provider.
- “Medium”: Medium data provider;
- “Large”: Big data provider.

Finally, we also offer the possibility for each hospital to have an integration server and a production server. Healthdata.be will deploy the new release of the application on the integration server. This will allow you to accept or decline the promotion of a new release of the HD4DP v2.0 application to the production server. This option is highly recommended, but not mandatory.
Therefore, could you answer the question: Do you want to first deploy HD4DP on an integration server? Yes/No. If Yes, Could you provide a server whose label used for specifications is ‘Small’ (following the instructions in section 1 of this mail), that is:
- Processors number: 1
- Physical cores/Processor : 8
- RAM memory : 16 Go
- Disk space: 100 Go
- Network Station Mount with Space for Backups
- Operating System: Linux Ubuntu v18.04
- Virtualization
Server installation timing
In order to establish the deployment schedule for the HD4DP v2.0 application within your organization, we would like to know when the server could be installed and configured. To this end, could you give us the 2 dates relating to the installation of the server:
- Starting date ;
- Finalization date.
Based on these dates, an employee of healthdata.be will regularly monitor the operations linked to the installation of the server.
For any request for information on installing the HD4DP v2.0 server, please send an email to hd-architecture-20@sciensano.be.
HD4DP v2 Infrastructure instructions
HD4DP v2 Infrastructure instructionsIntroduction
This document is written for IT staff / system engineers of data providers and therefore assumes technical knowledge. It acts as a guide through the onboarding process of HD4DP v2.0 and covers installation of the server, user configuration, network configuration and remote access.
The order of steps in this document should be respected during execution.
Overview
HD4DP v2.0 consists of a modular application stack, which allows healthdata.be to seamlessly upgrade individual elements.
An HD4DP v2.0 deployment comprises of following components:
- Form.io component
- MongoDB
- PostgreSQL
- Nextgen Connect
As it is the case in HD4DP v1.0, an Encryption Module with a connection to the eHealthBox is still required for HD4DP v2.0 and must be provided by the data provider.

Network configuration
IP
The HD4DP server needs to be accessible via domain names in DNS and must have a static IP in your private network.
DNS
The application stack of HD4DP v2.0 requires four domain names pointing to the IP of the locally installed HD4DP v2.0 server. Use the following names in your DNS:
- nextgenconnect.hd4dp.<yourdomain.be>
- hd4dp.<yourdomain.be>
- metabase.hd4dp.<yourdomain.be>
- admin.hd4dp.<yourdomain.be>
Firewall
The following connections should be possible in the firewall flow:
- To and from (a) machine(s) in your IT department on port 22 for initial configuration and local support.
- To and from the Encryption Module server. The protocol and ports depend on your local EM implementation. Contact your EM vendor if more information is necessary.
- Reachable by your staff who uses HD4DP, on ports 80 and 443 for HTTP(s) traffic.
- To and from the LDAP server (this is not mandatory if you are not using LDAP to authenticate) (port 389 by default)
The healthdata.be proxy server is used as a gateway to the internet for the security of HD4DP servers. The configuration of this proxy server will be provided to you by healthdata.be at a later date.
Server installation
To install the application stack of HD4DP v2.0, healthdata.be requires a fresh installed operating system, specifically Ubuntu Server 18.04 LTS.
Please use these instructions even if you have previous experience with installing this operating system, as its configuration is specific for healthdata.be.
These instructions assume that the network configuration described in the previous section is completed.
Instructions
HD4DP v2.0 requires a (virtual) machine running Ubuntu Server 18.04 LTS.
We assume knowledge of loading a .iso file onto a (virtual) machine. Healthdata.be can’t provide instructions for this, as the environment of your center is unknown. Should you have any trouble, however, please contact Healthdata.be support so that we can help out.
Please find the installation steps below.
Installation steps
- Download the .iso file from the link below.
Download Ubuntu Server 18.04 LTS - Create a new (virtual) machine with Linux Ubuntu 64 bit as the OS family
- When prompted, select the .iso file downloaded in step 1.
- After some time, you will be prompted to select a system language. Select English.
- “Keyboard configuration”
Select your preferred keyboard layout and press enter - “Network Connections”
Highlight the network interface and press enter. Navigate as follows:
Edit IPv4 -> Manual -> enter the network details -> save -> Done - Proxy IP -> Leave default/empty.
- “Configure Ubuntu Archive Mirror” -> leave default
- “File system Setup” -> Use An Entire Disk
- Proceed until “Confirm destructive action” -> press continue. The installation process starts, this can take several minutes.
- In the meantime, create the user for Healthdata.
username = healthdata,
Password = choose a secure password and communicate it to healthdata.be. - Mark “Install OpenSSH server”. This will be used for remote access. “Import SSH Identity” -> no -> done
- “Featured Server Snaps” -> Select nothing and press Done.
- Wait until installation is finished.
Configuration steps
Connecting to the server
Log into the machine with the healthdata.be user created in the previous section.
Instructions (from a Windows machine):
- Install the tool Putty and open the application.
- On the configuration screen, enter the following (replace cursive text with the appropriate values)
- Host Name: healthdata@server_private_ip
- Port: 22
- Connection type: SSH
- Click Open. Enter the password (you will not see text as you type, you can paste into putty by right-clicking in the terminal).
- You should now be logged in and see a prompt “healthdata@server_name:~$”
Administrator account for internal use
An administrator account for internal use can be created on the HD4DP v2 server.
The configuration of remote access (described below) should not happen on this account, but on the Healthdata.be account.
The internal account can later be used to install and configure OS monitoring software and antivirus software by the internal IT team. For more information, see the section on Antivirus and Monitoring.
(Text with a gray background should be entered as a command in the terminal of the server)
Create the user:
sudo adduser <username>
Add the user to the sudo group
sudo usermod -aG sudo <username>
Installation and configuration of the software stack
Healthdata.be support will instruct you when to execute the next step, which is to enable remote access so that Healthdata.be can execute the software installation and configuration.
Backups
The configuration of the HD4DP v2.0 server is administered by healthdata.be and doesn’t require backups.
HD4DP v2.0 regularly dumps its databases automatically to the /backup directory on the server. A network storage should be mounted at this location.
Please fill out the infrastructure sheet with the required credentials, domain name/url, protocol… to connect to the network drive. The connection will then be configured by healthdata.be.
Patching and Updates
Healthdata.be configures HD4DP v2.0 servers to automatically receive recommended security updates. The choice for Ubuntu 18.04 LTS is motivated by the long-term support for this version. Security flaws are rare in this distribution, and security updates are quick and often don’t require a system reboot.
If your organization's IT department prefers to manage patches, this is possible but not recommended. Please use the account for internal use created in Section 3 for this purpose.
Antivirus and Monitoring
Most data providers will want to manage their own antivirus and OS monitoring on all machines in their network. Installation of such software on the HD4DP v2.0 server is allowed, but healthdata.be should be informed about all extra software installed on the server. Additionally, healthdata.be will not provide support for the installation of this software.
Contact information
HD4DP v2 Infrastructure sheet
HD4DP v2 Infrastructure sheetThe HD4DP v2.0 Infrastructure Sheet contains information that healthdata.be needs in order to start the installation of the HD4DP v2.0 Software at your organization.
Below you can find the description of the necessary information:
SERVER CONNECTION
Healthdata.be performs its installation and support tasks remotely (using VPN or remote port forwarding via SSH). Please provide the required credentials.
- Type of connection (VPN / Remote port forwarding via SSH)
- Link (IF VPN)
- Username, token, other (if VPN)
- Password (if VPN)³
- Public SSH Key (if remote port forwarding)
³ For security reasons, we advise to communicate passwords to us either by phone, or via a link using a secret-sharing service such as onetimesecret.com.
SERVER MACHINE
- Server Name
- Internal IP-Address
- Ram (in GB)
- CPU (number of CPU's and number of cores)
- Disk space (in GB)
- Username: Healthdata
- Password ³
³ For security reasons, we advise to communicate passwords to us either by phone, or via a link using a secret-sharing service such as onetimesecret.com.
ATTACHED DRIVE FOR BACKUPS
HD4DP v2.0 regularly performs data dumps for backup purposes. Please provide connection information to a network share volume.
- Link / IP address
- Path
- Username
- Password ³
³ For security reasons, we advise to communicate passwords to us either by phone, or via a link using a secret-sharing service such as onetimesecret.com.
USER MANAGEMENT
HD4DP v2.0 can either connect to a LDAP server or use its own application database for performing user authentication and management. Please check the user management mechanism you want to use.
- LDAP user management : Yes / No
- Application user management : Yes / No
LDAP configuration (Optional)
If you chose ‘LDAP user management’ as user management mechanism, please provide the following information that allows us to connect to your LDAP system.
- Connection URL
- Username
- Password³
³ For security reasons, we advise to communicate passwords to us either by phone, or via a link using a secret-sharing service such as onetimesecret.com.
SOFTWARE CONFIGURATION
Encryption Module interface
HD4DP v2.0 communicates with the Encryption Module (EM) either using the file system interface or by calling a REST web service. Please choose which interface HD4DP should use for its communication with the Encryption Module.
Note: If the encryption module is not yet purchased (or developed), HD4DP v2.0 can already be installed; the EM can then be configured in HD4DP v2.0 once it is available. Please note that HD4DP 1.x and HD4DP v2.0 can’t use the same EM.
- REST web service
- File system
REST web service interface
If you chose to communicate with the Encryption Module using a REST interface, please provide the web service URLs that should be used by HD4DP v2.0 for its communication with EM.
- "Outgoing flow URL: Example: http://host:8080/encryptionmodule/send"
- "Incoming flow URL : Example: http://host:8080/encryptionmodule/receive"
File system interface
- "Incoming directory: Directory where HD4DP checks for incoming files"
- "Incoming directory: Directory where HD4DP writes outgoing files"
- "Incoming directory: Directory to which HD4DP moves successfully processed files"
- "Incoming directory: Directory to which HD4DP moves unsuccessfully processed files"
Requirements for the HD4DP installation
Requirements for the HD4DP installationThis documentation details the necessary adaptations to be performed in order to allow the necessary technical accesses and smooth operation of the different healthdata.be platforms and interfaces.
The file is available for download below.
HD4DP v2 CSV Upload
HD4DP v2 CSV UploadThe CSV upload functionality gives the possibility to import multiple parameters from a set of patients in one time into HD4DP2.0. The csv-file is based on an extract of the electronic patient files and/or other local databases.
Currently there is no user-interface in HD4DP2.0 for uploading csv-files. If a data provider wants to upload a csv-file, the file has to be dropped at a specific location. These files will be picked up and processed periodically. The files should be “final”, meaning that no application is writing to them. The pick-up location will be identical for all registries.
Pre-registry handling will be based on a naming-convention of the csv file.
Refer to the following page(s) for DCD specific CSV Upload documentation.
Architecture 2.5
Architecture 2.5 Bart.Servaes Thu, 05/23/2024 - 11:04Uniformed naming convention
Uniformed naming conventionChange name:
Create DCD formio naming structure using a general overall naming convention of healthdata.be projects.
Change Description:
The change is to refactor the formio DCD naming to have a structure as:
HDBPnumberHDBPabbreviationdcdname/abbreviationversionnumber
Where the abbreviation will be used as seen in the column “TX_PROJ_BUS_ABBREV” of the document below, that will be a reference to fill the MDM:
Example 1:
So for the formio DCDs of the project “Mandatory registration of spine surgery” (full name) it would be something like:
HDBP0240_SPINE_1 and because there is only 1 dcd for the project we do not use a dcd name.
Example 2:
So for the formio DCDs of the project “Pneumology Endobronchial valve” (full name) it would be something like:
HDBP0231_ZEPHYR_ZEPHYR_REPLAC_1
HDBP0231_ZEPHYR_ZEPHYR_PRIM_IMPLT_1
Full example:
dcdname/abbreviation: will be the TX_REG_NAME of the DCD.
| form title | form name | form path | collection name |
| HDBP0240_SPINE | hdbp0240Spine1 | hdbp0240spine1 | HDBP0240SPINE1 |
| HDBP0231_ZEPHYR_ZEPHYR_PRIM_IMPLT | hdbp0231ZephyrZephyrPrimImplt1 | hdbp0231zephyrzephyrprimimplt1 | HDBP0231ZEPHYRZEPHYRPRIMIMPLT1 |
Sending code values instead of code IDs in S2S requests
Sending code values instead of code IDs in S2S requestsIn the following example we will demonstrate sending code values instead of code IDs. We want, for instance, to send a patient's country and zip code information, more specifically for someone who lives in Brussels, Belgium:

Currently, in the case of fields containing code list elements with S2S submissions, we send the code ID in the body of the message, like so:
"CD_CNTRY_RES": "130349",
"CD_POSTCODE": "4525",
In CSV upload, however, we send the code value of the code object.
From the new Architecture 2.5 onward, we will do so too for S2S submissions using the API. So, for the example above, the new way of sending the same values will be as follows:
"CD_CNTRY_RES": "BE", "CD_POSTCODE": "1000",The image below shows the relationship between these fields in the database, in the case of the country:

And for the postal code:

The purpose of this change is to stop sending the code IDs in System-to-System and start sending the code values, hence to be consistent with the CSV upload method. The performance improvements that go along with this result from the fact that the service that returns the code value for a given ID is done through a single request per submission to the MDM, thus saving a lot of time in calls to get these values.
Since the code value is not unique, we need to get the codelist ID of an element, given its key, from a given DCD version ID. This could be summarized for this example as follows:
The key CD_CNTRY_RES on DCD version ID 55 (BSACC Police And Public Prosecutor) has the codelist id 347.
The key CD_POSTCODE on DCD version ID 55 (BSACC Police And Public Prosecutor) has the codelist id 12.
Code Lists and Code Values are agreed upon by IAT and the Researchers. These are sent to DC by IAT via the DCD specifications. A Code ID is the identification of a Code Value in MDM. So how is the translation done?
In the case of sending code IDs, the user calls our services to retrieve the code IDs through requests to our API. In these requests, the user always receives the complete code object, containing not only the code ID, but also the code value. Let’s have a look at an example for the country code (code list 347):

The image shows how we were sending the code ID 130349 in System-to-System and how we can send the code value “BE” in Architecture 2.5, the same way it was already done using the CSV Uploader.
In terms of code, if we were already calling the services to get the code ID, the only thing that is necessary is changing the returned value from CodeID to CodeValue from the same Code object that is returned.
FROM:
mappedCode = codeFieldService.getFieldCode(field.getFieldId(), codeContent).codeId();TO:
mappedCode = codeFieldService.getFieldCode(field.getFieldId(), codeContent).codeValue();That’s the only change needed in the mapping. All the rest remains exactly the same.
For more information, please check our documentation at 1. End-to-End process to submit DCD registrations | docs.healthdata.be
Architecture 2.0 and Architecture 2.5 proxies
Below you find an example of how the service to get a project-result is called in both proxies:
Architecture 2.0
https://hd4dp.acceptance.healthdata.be/proxy/api/installation/project-result?organization-id=120
[{"projectId":4,"dcdId":9,"dcdVersionId":9,"version":1,"formioName":"hdbp0231ZephyrZephyrPrimImplt1"}, {"projectId":4,"dcdId":10,"dcdVersionId":10,"version":1,"formioName":"hdbp0231ZephyrZephyrReplac1"}, {"projectId":4,"dcdId":11,"dcdVersionId":11,"version":1,"formioName":"hdbp0231ZephyrZephyrFllwup1"}, {"projectId":5,"dcdId":12,"dcdVersionId":12,"version":3,"formioName":"hdbp0062BelPstSpineTangoIntake1"}, {"projectId":5,"dcdId":13,"dcdVersionId":13,"version":3,"formioName":"hdbp0062BelPstSpineTangoConservativeTherapy1"}, {"projectId":5,"dcdId":14,"dcdVersionId":14,"version":3,"formioName":"hdbp0062BelPstSpineTangoPatientQuestionnaire1"}, {"projectId":5,"dcdId":15,"dcdVersionId":15,"version":3,"formioName":"hdbp0062BelPstSpineTangoSurgery1"}, {"projectId":6,"dcdId":16,"dcdVersionId":16,"version":1,"formioName":"hdbp0000TestTestDcd011"}, {"projectId":6,"dcdId":17,"dcdVersionId":17,"version":1,"formioName":"hdbp0000TestTestDcd021"}, {"projectId":7,"dcdId":18,"dcdVersionId":18,"version":1,"formioName":"hdbp0386OrthoprideHipOpHipPrimImplt1"}, {"projectId":7,"dcdId":19,"dcdVersionId":19,"version":1,"formioName":"hdbp0386OrthoprideHipOpHipRevis1"}, {"projectId":7,"dcdId":20,"dcdVersionId":20,"version":1,"formioName":"hdbp0386OrthoprideHipOpHipResec1"}, {"projectId":8,"dcdId":21,"dcdVersionId":21,"version":1,"formioName":"hdbp0288OrthoprideKneeOpKneePrimImplt1"}, {"projectId":8,"dcdId":22,"dcdVersionId":22,"version":1,"formioName":"hdbp0288OrthoprideKneeOpKneeRevis1"}, {"projectId":8,"dcdId":23,"dcdVersionId":23,"version":1,"formioName":"hdbp0288OrthoprideKneeOpKneeResec1"}, {"projectId":9,"dcdId":24,"dcdVersionId":24,"version":1,"formioName":"hdbp0048OrthoprideMegaOpMpPrimImplt1"}, {"projectId":9,"dcdId":25,"dcdVersionId":25,"version":1,"formioName":"hdbp0048OrthoprideMegaOpMpRevis1"}, {"projectId":9,"dcdId":26,"dcdVersionId":26,"version":1,"formioName":"hdbp0048OrthoprideMegaOpMpResec1"}, {"projectId":1,"dcdId":1,"dcdVersionId":30,"version":3,"formioName":"hdbp0025HhNsihHhPre3"}, {"projectId":1,"dcdId":2,"dcdVersionId":31,"version":3,"formioName":"hdbp0025HhNsihHhIo3"}, {"projectId":1,"dcdId":3,"dcdVersionId":32,"version":3,"formioName":"hdbp0025HhNsihHhPost3"}, {"projectId":10,"dcdId":27,"dcdVersionId":33,"version":1,"formioName":"hdbp0245TaviTaviImplt1"}, {"projectId":10,"dcdId":28,"dcdVersionId":34,"version":1,"formioName":"hdbp0245TaviTaviFllwup1"}, {"projectId":11,"dcdId":29,"dcdVersionId":35,"version":1,"formioName":"hdbp0000CorrectionForm1"}, {"projectId":13,"dcdId":34,"dcdVersionId":40,"version":2,"formioName":"hdbp0016PacemakerQermidPacemakerPrimoImplantation2"}, {"projectId":13,"dcdId":35,"dcdVersionId":41,"version":2,"formioName":"hdbp0016PacemakerQermidPacemakerAjoutRemplacementElectrode2"}, {"projectId":13,"dcdId":36,"dcdVersionId":42,"version":2,"formioName":"hdbp0016PacemakerQermidPacemakerRemplacement2"}, {"projectId":13,"dcdId":37,"dcdVersionId":43,"version":2,"formioName":"hdbp0016PacemakerQermidPacemakerExplantation2"}, {"projectId":13,"dcdId":38,"dcdVersionId":44,"version":2,"formioName":"hdbp0016PacemakerQermidPacemakerSuivi2"}, {"projectId":14,"dcdId":39,"dcdVersionId":45,"version":3,"formioName":"hdbp0019Bewsd3"}, {"projectId":15,"dcdId":40,"dcdVersionId":46,"version":2,"formioName":"hdbp0012AngioHospitalisatie2"}, {"projectId":15,"dcdId":41,"dcdVersionId":47,"version":2,"formioName":"hdbp0012AngioHospitalisatieMetPci2"}, {"projectId":15,"dcdId":42,"dcdVersionId":48,"version":2,"formioName":"hdbp0012AngioHospitalisatieMetFfr2"}, {"projectId":15,"dcdId":43,"dcdVersionId":49,"version":2,"formioName":"hdbp0012AngioHospitalisatieMetFfrEnPci2"}, {"projectId":15,"dcdId":44,"dcdVersionId":50,"version":2,"formioName":"hdbp0012AngioFollowUpNaPci2"}, {"projectId":16,"dcdId":45,"dcdVersionId":51,"version":1,"formioName":"hdbp0240Spine1"}, {"projectId":17,"dcdId":46,"dcdVersionId":52,"version":4,"formioName":"hdbp0008Crrd4"}, {"projectId":19,"dcdId":48,"dcdVersionId":54,"version":1,"formioName":"hdbp0242BsaccMeBsaccReprt1"}, {"projectId":19,"dcdId":49,"dcdVersionId":55,"version":1,"formioName":"hdbp0242BsaccMeBsaccFuPolce1"}, {"projectId":19,"dcdId":50,"dcdVersionId":56,"version":1,"formioName":"hdbp0242BsaccMeBsaccFuCont1"}, {"projectId":19,"dcdId":51,"dcdVersionId":57,"version":1,"formioName":"hdbp0242BsaccMeBsaccFuReferral1"}, {"projectId":19,"dcdId":52,"dcdVersionId":58,"version":1,"formioName":"hdbp0242BsaccMeBsaccFuMed1"}, {"projectId":19,"dcdId":53,"dcdVersionId":59,"version":1,"formioName":"hdbp0242BsaccMeBsaccFuPsychc1"}, {"projectId":20,"dcdId":54,"dcdVersionId":60,"version":9,"formioName":"hdbp0001Bcfr9"}, {"projectId":21,"dcdId":55,"dcdVersionId":61,"version":3,"formioName":"hdbp0078Pitter3"}, {"projectId":22,"dcdId":56,"dcdVersionId":62,"version":3,"formioName":"hdbp0051Becpr3"}, {"projectId":23,"dcdId":57,"dcdVersionId":63,"version":1,"formioName":"hdbp0037Epilabo1"}, {"projectId":24,"dcdId":58,"dcdVersionId":64,"version":1,"formioName":"hdbp0244RProfildRprofildTreat1"}, {"projectId":24,"dcdId":59,"dcdVersionId":65,"version":1,"formioName":"hdbp0244RProfildRprofildRenewal1"}, {"projectId":25,"dcdId":60,"dcdVersionId":66,"version":1,"formioName":"hdbp0274HartDefibDefibPrimImplt1"}, {"projectId":26,"dcdId":61,"dcdVersionId":67,"version":1,"formioName":"hdbp0056MvoMvoImp1"}, {"projectId":26,"dcdId":62,"dcdVersionId":68,"version":1,"formioName":"hdbp0056MvoMvoFu1"}, {"projectId":25,"dcdId":63,"dcdVersionId":69,"version":1,"formioName":"hdbp0274HartDefibDefibExpl1"}, {"projectId":25,"dcdId":64,"dcdVersionId":70,"version":1,"formioName":"hdbp0274HartDefibDefibRepl1"}, {"projectId":25,"dcdId":65,"dcdVersionId":71,"version":1,"formioName":"hdbp0274HartDefibDefibElect1"}, {"projectId":27,"dcdId":67,"dcdVersionId":72,"version":1,"formioName":"hdbp0000DvrForm1"}]Architecture 2.5
[{"projectId":19,"dcdId":49,"dcdVersionId":55,"version":1,"formioName":"hdbp0242BsaccMeBsaccFuPolce1"}]As we can see, using proxy (Architecture 2.0) we have all projects from organization 120, while proxy (Architecture 2.5) returns only one element in its response. This is because the DCD filter in proxy (Architecture 2.5) is done in the database more efficiently, while in the proxy Architecture 2.0 the same filter was done in the code after the service call.
So, the filter is not used in the first call and if Architecture 2.0 calls the same service in Architecture 2.5 without the filter (https://hd4dp.acceptance.healthdata.be/proxy/api/installation/project-result?organization-id=120) it will get exactly the same result.
Architecture 2.0 and Architecture 2.5 proxies tests
CSV Uploader
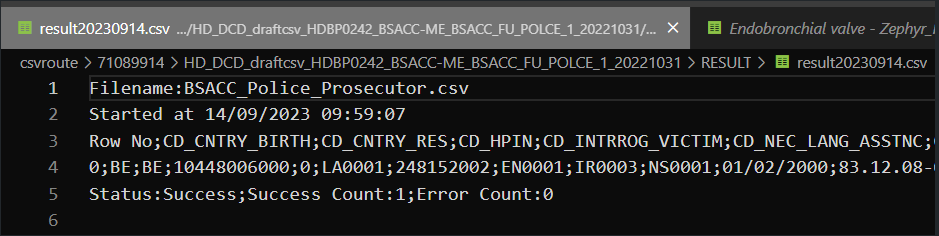
For the CSV Upload, nothing has changed. So the same inputs are valid for both architectures. Here are the example of some successful tests:

System-To-System
For S2S, as already mentioned, the only difference is that Architecture 2.0 sends Code IDs while Architecture 2.5 sends Code Values. Here are the same tests in both architectures:
Proxy (Architecture 2.0):

Proxy (Architecture 2.5):

As we can see, we have the same request, where the first sends Code IDs and the second sends Code Values; both return a successful response.
Front-end
In the front-end (GUI) everything is received normally as the same request was sent twice. After all, S2S will always send the same request with Code IDs to FormIO.

Data Warehouse
Once again, all the information arrives seamlessly, due to the fact that the FormIO validation already happened in the previous step:

First call (Architecture 2.0):

Second call (Architecture 2.5):

MDM Mapping of billing codes for MyCareNet
MDM Mapping of billing codes for MyCareNetNote: The below described mapping solution only applies to the study project of PACEMAKER.
In Architecture 2.0 the DCD fields related to billing codes for MyCareNet do not contain the billing code as their code value, instead this is just a numerical value, and the code value is only displayed in the label, e.g.:

When then sending key values to localdwh and dwh, the submission will contain a key value as follows:

When generating a message for MyCareNet, however, this same numerical value is used in the message payload. Keeping these numerical values, will generate MyCareNet messages with a incorrect billingcode, in this case <BillingCode>2</BillingCode>.
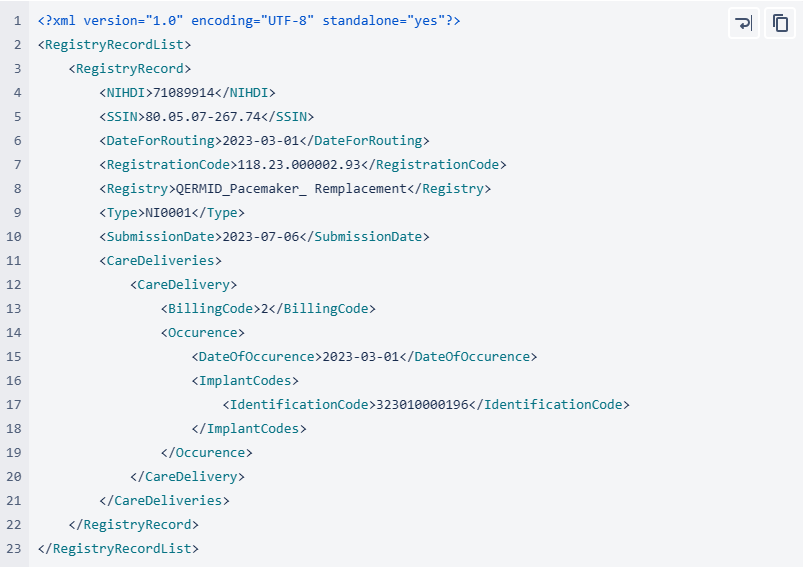
In Architecture 2.5 an MDM Mapping of billing codes for MyCarenet has been implemented. The value for the key will no longer be a numerical value such as 1,2,3… but an actual billing code. To facilitate this requirement, a new column has been introduced in the MDM to associate the billing code with the correct 13 character value, such as "182932-182943". This billing code will be accepted by MyCareNet.
Databases
Databases Bart.Servaes Wed, 06/12/2024 - 05:52HD4DP v2 Online Acceptance Environment
HD4DP v2 Online Acceptance EnvironmentIntroduction
To support the development and validation of data transfers using S2S API or CSV upload, a central Online Acceptance (OACC) environment has been made available for the IT services or IT partners of data providers. This environment is meant to replace the locally installed acceptance environments at the side of the data providers. In the OACC Environment you can test and validate the three types of data transfer:
Visit the S2S API and CSV Upload documentation for a general description of the respective data transfer methods.
In order to keep the OACC environment light, it is rebuilt once a week (each Saturday). The data are stored locally and will not be sent to healthdata.be infrastructure. The testing is limited to the upload to the HD4DP v2 application.
Additional field information about the codes and the formats used for the Author group, NISS code, status, Country and Postal Code, "Date" - "Date:Time", Repeatable fields and Multiple choice fields is to be found here.
Application URLs and port
- Front-End Application URL: https://hd4dp.acceptance.healthdata.be
- SFTP host name: sftp.acceptance.healthdata.be and port 2220
- S2S API: https://hd4dp.acceptance.healthdata.be/proxy/api/dcd/payload/submit?organization-id=00&dcd-id=00&version=1
Credentials for accessing the Online Acceptance (OACC) environment
Upon requesting credentials to access the OACC environment, you will receive 3 different types of credentials:
⦁ credentials to log in to the front end of the online acceptance environment
⦁ credentials to use the API (-> authorization tab in Postman)
⦁ credentials for the SFTP server you use to test the CSV Upload
If your organization is not available for selection in the drop-down list, we advise you to request your credentials through our service portal at https://sciensano.service-now.com/sp via the Request something tab and subsequently the Request for Information box.
Navigate to the Online Acceptance (OACC) environment
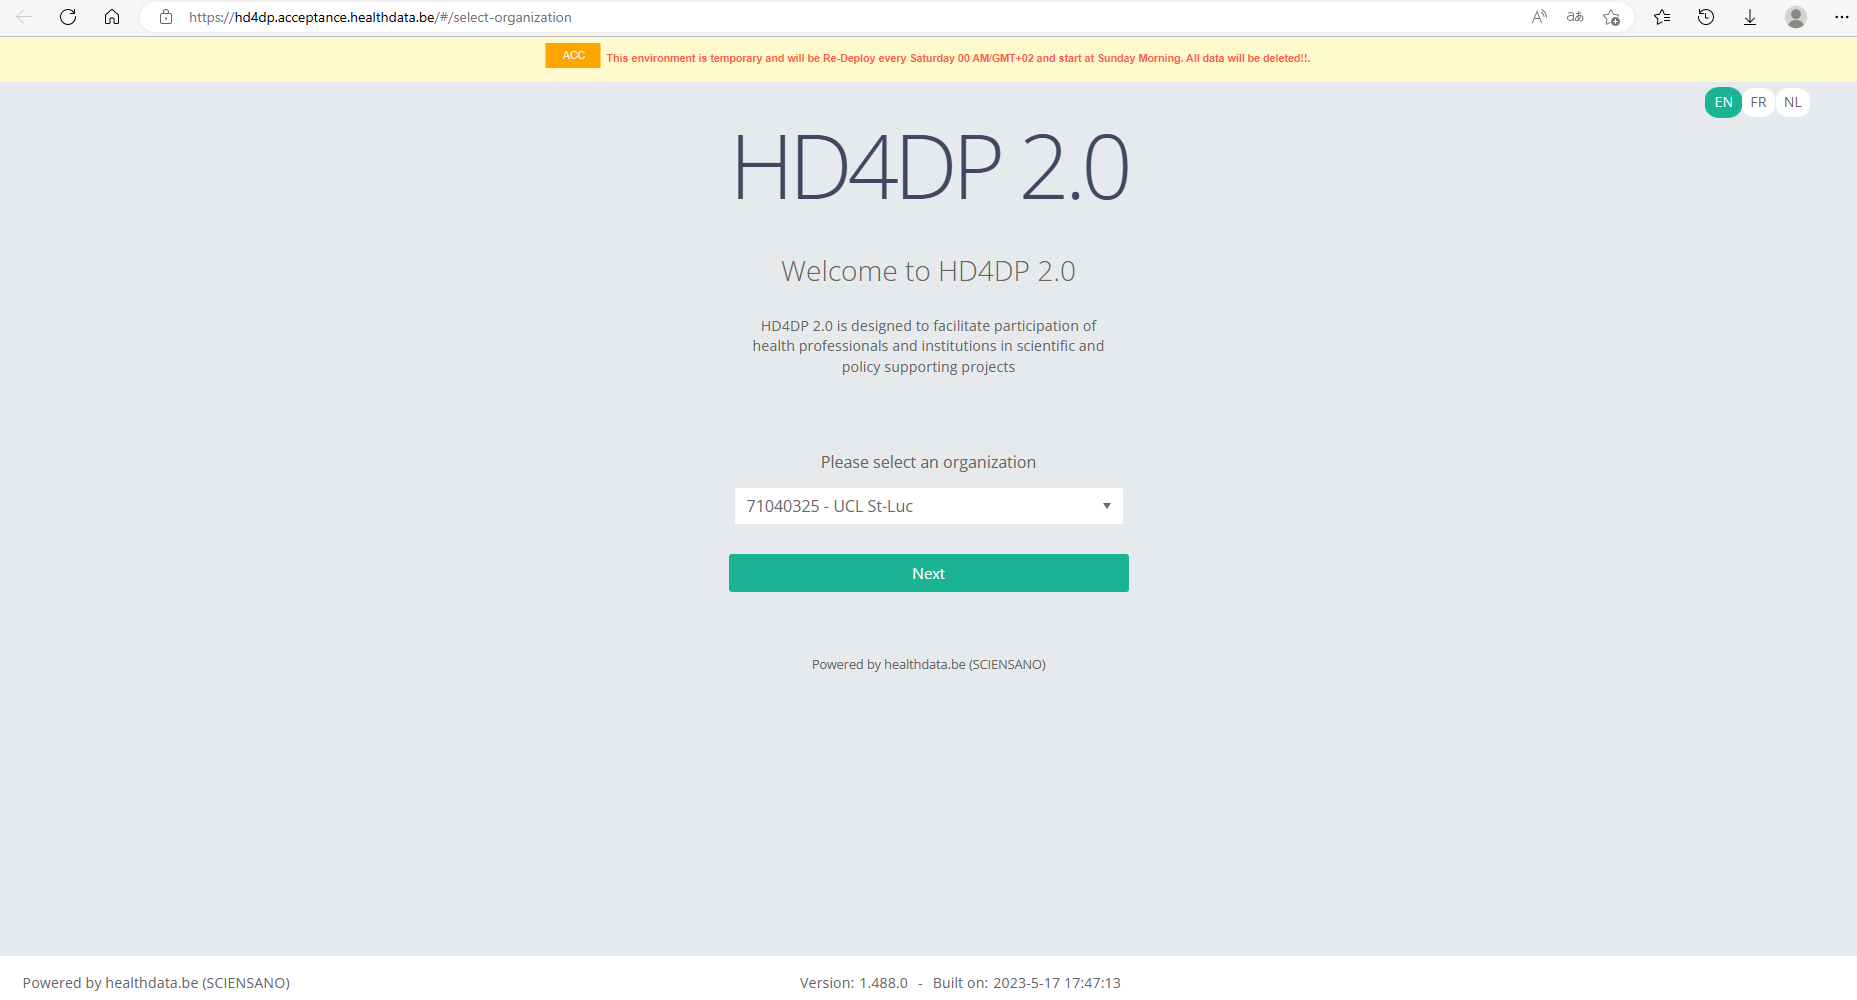
The OACC environment can be found on https://hd4dp.acceptance.healthdata.be, which is a publically accessible URL.
On the homepage you are requested to select your organization from the drop-down list in order to proceed.
Log in with the credentials you have received upon request. The username is test@sciensano.be for all users.
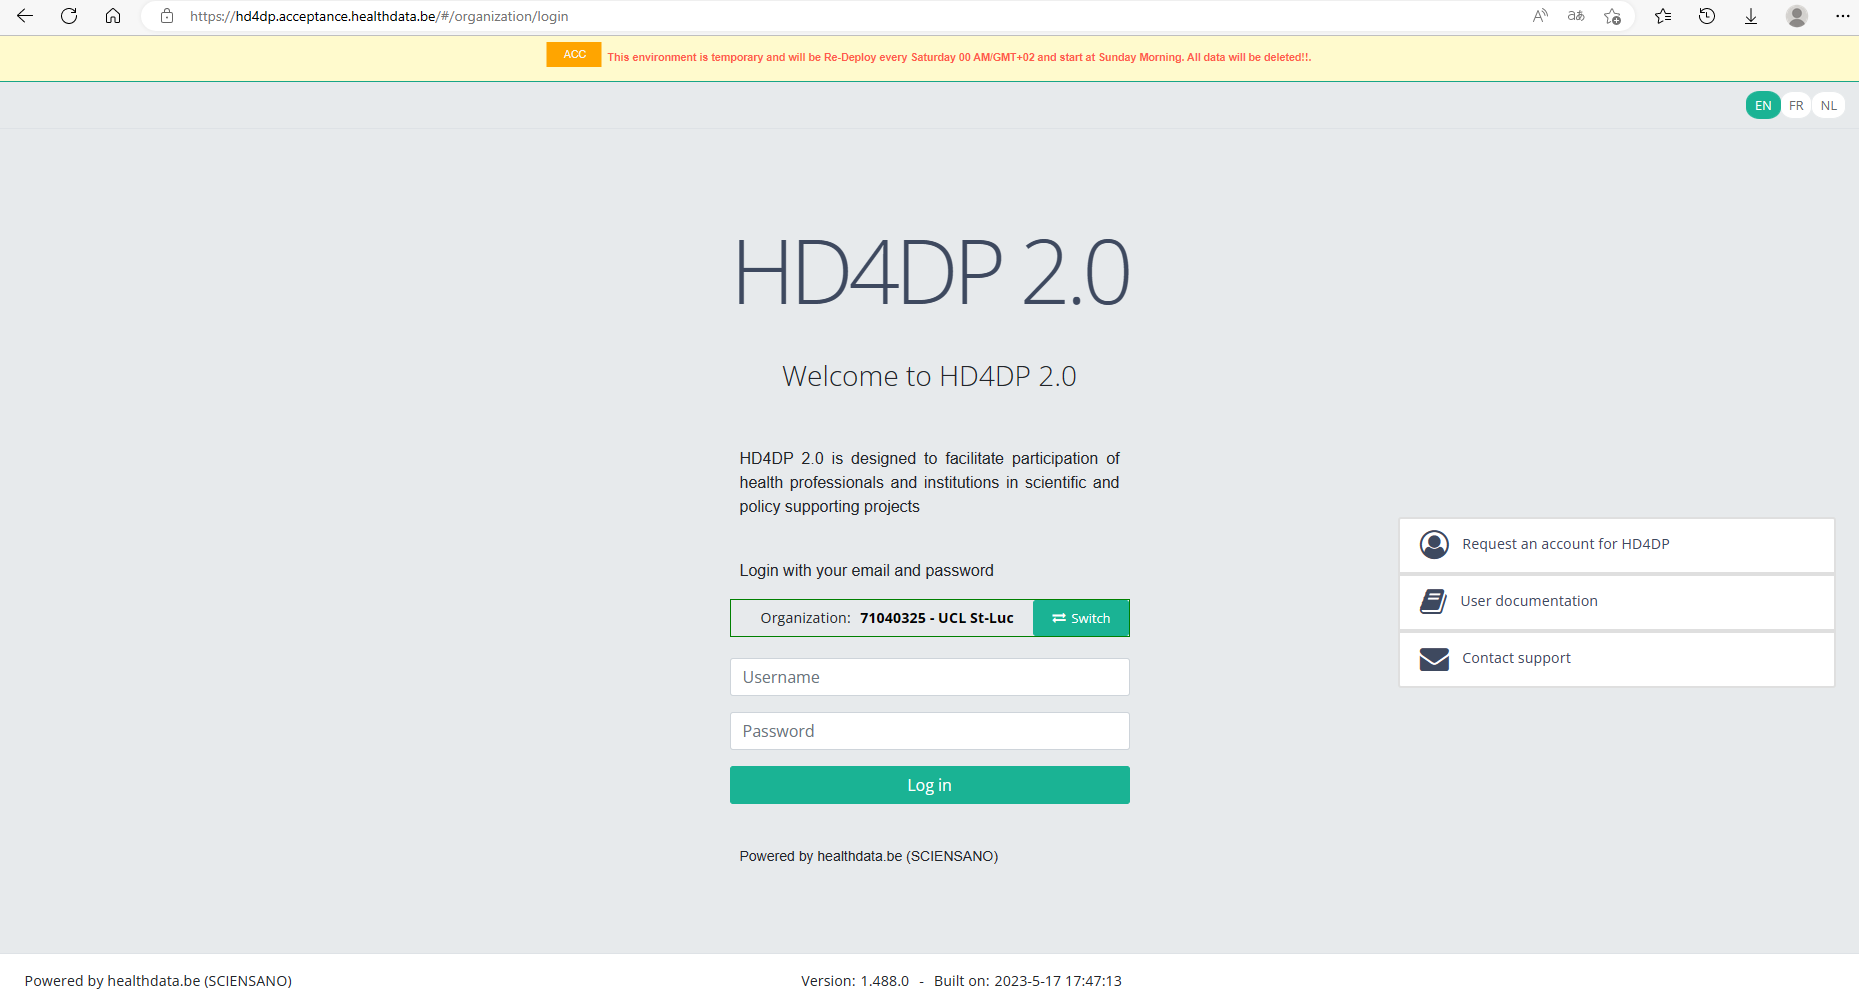
Once logged in, the layout looks very familiar: to the left you will find the navigation panel with all running projects . Note that the list of projects featuring in our Online Acceptance Environment is not filtered out for the organization you have selected.

The data transfer methods
As mentioned above, the Online Acceptance Environment enables the testing of the uploads for the following three types of data transfer. They are described below according to the timeline of developement:
Manual input in the study form
This data transfer method is the form entry, carried out manually. For this you can use a common browser such as Google Chrome. This method can also be used to validate data sent via S2S API or CSV Upload.
Data transfer via an SFTP client
The csv upload is the second type of data transfer. The data are transferred to an SFTP server and subsequently picked up by the healthdata.be system. This transfer method requires the use of an SFTP client, such as WinSCP (freely available).
The Login window will look as follows:

Herein, you enter Host name (sftp.acceptance.healthdata.be) and Port number (2220).
Credentials for the SFTP folder are shared together with the Front-end and API credentials as described in the section “Navigate to and access the Online Acceptance Environment”.
When logging in to WinSCP, you will need to navigate to the correct csv folder : csv/<project>/<dcd>. Here you need to drag and drop the csv you want to upload from the left panel to the right panel. The CSV file will now be picked up by the polling system of the CSV Uploader, which checks for new CSV files every minute.
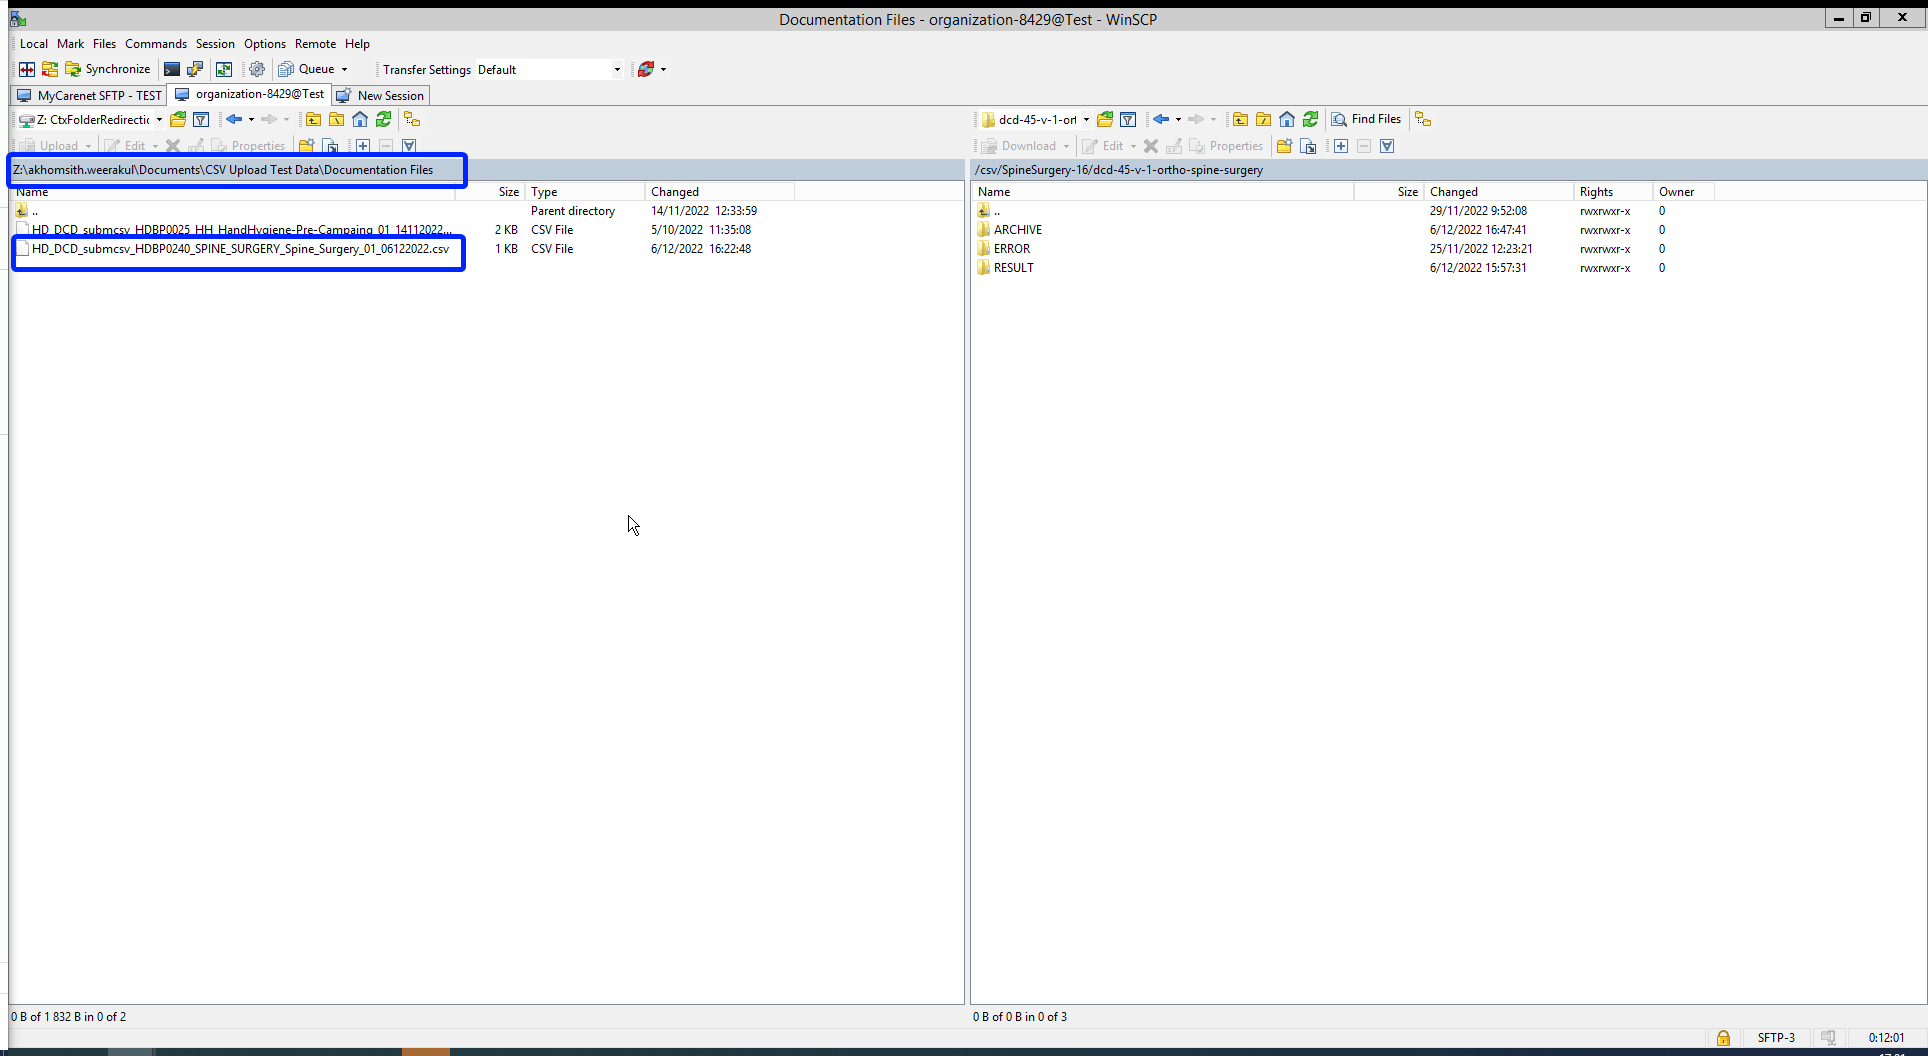
The folders Archive and Result will only be created after the first CSV file has been uploaded for testing.
The Result folder shows a log file containing CSV Upload reports. The status Error Count shows technical errors such as incorrect name, code …
CSV files that were uploaded in Architecure 1 can be reused in Architecture 2. Prerequisite for this is the addition of necessary fields that are typical for Architecture 2, e.g.:
- Author Group (TX_AUTHOR_GR) with the value "Test group"
- Author (TX_AUTHOR) with the value "test@sciensano.be"
- Coauthor (TX_COAUTHOR) with the value "test@sciensano.be"
To further facilitate the process of reusing CSV files a mapping table with old and new CSV names is provided.
Next to adding fields, you can also leave out fields, which is indicated in the log file reports as a warning.
Once again the download process can be checked in the study forms on the front-end interface. You want to refresh the window to update to the newest status.
Data transfer via an API platform
The data are extracted directly from the EPD systems and sent to HD4DP v2.0 local using S2S API before they are sent to healthdata.be. This third data transfer method requires the use of an API development platform, such as Postman (freely available).
The endpoint (URL) to send your payload to for testing is
https://hd4dp.acceptance.healthdata.be/proxy/api/dcd/payload/submit
This endpoint needs to be completed with some parameters, such as the ID of an organization, the ID of a dcd, the version number:
https://hd4dp.acceptance.healthdata.be/proxy/api/dcd/payload/submit?organization-id=6&dcd-id=18&Version=1
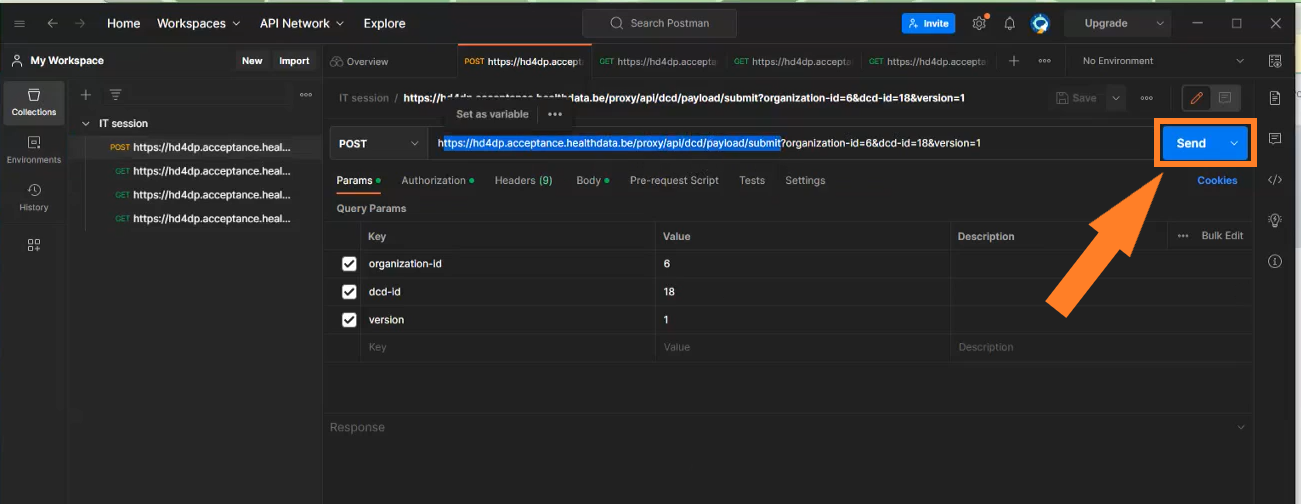
Click on the Send button to post the payload. A succesful submission is indicated with the status message “202 Accepted”. This can also be checked visually in the front end of the Online Acceptance Environment.
The field Data source in the top selection bar indicates whether the data were transferred via S2S API, CSV Upload or manually with HD4DP.

In the production environment, records that are sent via the API platform, go directly to the healthdata.be infrastructure. These records will receive the status “Submitted” in the Progress field.
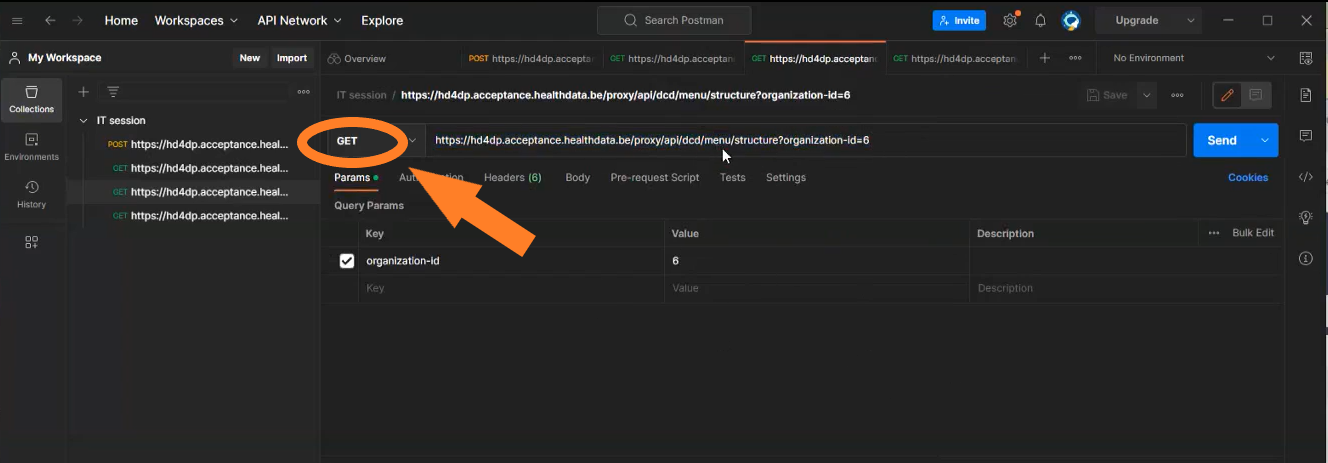
Next to posting payloads (POST) you can also retrieve information (GET). Examples of such "calls":
- The call https://hd4dp.acceptance.healthdata.be/proxy/api/organization (see below) will return an organization id:

- The call https://hd4dp.acceptance.healthdata.be/proxy/api/dcd/menu/structure?organization-id=6 (see below) will return the menu structure with all projects your organization is registered for.
Go here for a description of the API data transfer method. For additional detailed information about the codes and the formats used for the Author group, NISS code, status, Postal Code, "Date" - "Date:Time", repeatable fields and multiple choice fields please go here.
Requesting access
Requesting accessThe credentials for access to the online acceptance environment can be requested by sending a mail to support.healthdata@sciensano.be.
More information on how to create an incident in the service portal is available on https://docs.healthdata.be/documentation/hd4dp-v2-health-data-data-providers/how-report-incident
You will receive 3 types of credentials:
- Credentials for the HD4DP2 web form application.
- Credentials for the API data transfer.
- Credentials for the SFTP server to upload CSV files.
MongoDb Postgres Backup Restore & Retention
MongoDb Postgres Backup Restore & RetentionTo make sure the data is persistent on both healthdata.be's and data provider's side the back-up plan was confirmed and developed and tested as well, the postgres and the MongoDb will be taken the whole back-up on the daily basis, this will be taken care of the timer-service that has been recently introduced.
Last 30 days back-up will be kept in the same server share or in the local path, to enable the backup we have introduced the new ansible role called “mongo-postgres-backup”, and to invoke the backup option the following variables needs to be defined on the “Host_var” file on hd-inventory to the specific deployment.
Enabling the backup part on the target server: As soon as the ansible role added to the respective playbook and the above backup type added to the hd-inventory host vars to the main/master branch, this can be enabled automatically on the hd-updater daily run or manually triggering the hd-updater on the target side server.
- DP without external share
- DP without external share and VM back-up
- DP with external share (samba)
- DP provides external share (nfs)
then it’s better to keep the backup of the postgres-mongodb dumps, on different directory on the same server. To enable this backup type, we must add the below variable on to the respective host-vars in the hd-inventory.
backup_mount_type: "VmBackup"
----Default backup path is "/hd4dp-backup"
then it’s better to keep backup of the postgres-mongodb dumps, on different directory on the same server. To enable this backup type, we have to add the below variable on to the respective host-vars in the hd-inventory.
backup_mount_type : "local"
local_mount_path : /tmpBackup
then the below variable needs to be added to the respective hd-inventory host_var file.
backup_mount_type: "samba"
backup_mount_type: “samba”
samba_bkup_username: “user_name”
samba_bkup_domain: “example.com”
then the below variable needs to be added to the respective hd-inventory host_var file.
backup_mount_type: "nfs"
nfs_bkup_src: "0.0.0.0:/nfs/mount-share"
----Default backup path is "/hd4dp-backup"
Restore:
AS of the agreed approach is to restore the backup-dump manually by using the retention-script (restore_mongodb.sh & restore_postgresdb.sh) it can be found on the target server “/opt/hd-all/hd-backup”, by default it will restore the latest backup but if we wish to restore the particular date back this can be given as a input parameter refer below.
Restore Script Path on the target server:
/opt/hd-all/hd-backup
Mongo Restore Input param:
"Provide bkp file with full path name for restore e.g. ${local_mount_path}/hd4dp-backup/mongodbBackup/mongo-20220510_2004.tar.gz" & ) to the script.
Mongo restore script:
restore_mongodb.sh
Postrges restore input Param:
"Provide bkp file with fullpath name for pg_wal restore e.g. ${local_mount_path}/hd4dp-backup/postgresBackup/pg_wal_latest.tar.gz"
“Provide bkp file with fullpath name for pg_wal restore e.g. {local_mount_path}/hd4dp-backup/postgresBackup/base_latest.tar.gz
Postgres restore script:
restore_postgresdb.sh
Note:
The postgres backup service timer will be scheduled by 15:00 aprox, the Mongodb backup service timer will be scheduled by 22:00, backup retention will perform few basic checks ex it will check if the space is sufficient to store the current day backup.
Apache Superset
Apache SupersetThe person with the login can see all the data stored in the database. This means the personal data of the patient is VISIBLE to that user.
Superset
Sciensano uses Apache Superset to provide the Data provider with a user-friendly UI for data exploration and visualization from the Local DWH database. Superset allows the user to export data into a CSV, and create their own queries, …
Prerequirements
URL: https://superset.<domain> or http://<ip>:3030 is available. If this is not the case, your IT department needs to open the port or add the domain to the DNS server.
Username/Password: Our Servicedesk will forward, via a secure link, the username and password.
Login
Superset is available on the local installation via the URL: https://superset.<domain> or via http://<ip>:3030.
Use the credentials provided by the servicedesk of Healthdata.

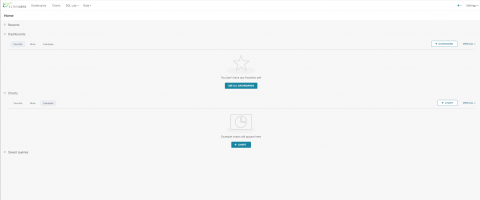
Home page
The first time you login to the application, an empty home folder will be shown. The more you use the application, the more tiles will be shown in your home dashoard. You see multiple subcategories like Favorite, Mine and Examples.
Favorite will show all the Dashboards, Charts or Queries you marked as a favorite.
Mine will show all the Dashboards, Charts or Queries you have created.
Examples leave it as is. You don't need to use this.

Dashboards
Dashboards are created under the dashboard menu (on the top menu). A list of shared and personal dashboard will be visible.
Default the dashboard Local DWH will be visible at first login.

Local DWH
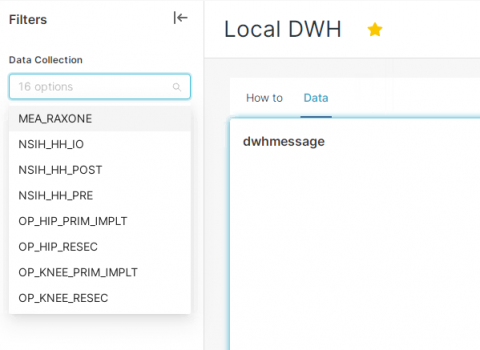
The local DWH dashboard will provide you a dashboard with some information on how particular features are working inside Superset and an option to show registrations based on the data collection name.
Remark: if you are not able to see the Filters column, click on the "wifi" icon or arrow on the left side of your screen.


Under the Data tab you will see 3 tables that are empty. With the filter (on the left side), you need to select what you want to see. You can select more Data collection at once and click on Apply FILTERS (bottom of the page).
After applying the filter, the data is now visible.
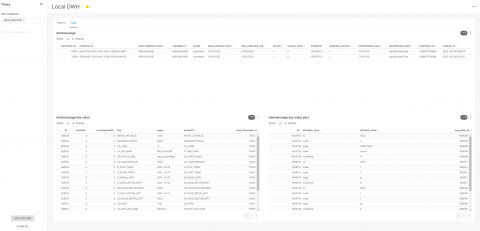
You can easily download each table by clicking on the 3 dots next to the filter icon in table:

A zip file will be created with the data provided in the table.
Remark: only the last 10000 records will be visible in the table. Downloading a higher amount of data can be done via the SQL Lab editor.
SQL Editor
The SQL Editor allows you to run your own query on the database.
Go to SQL Lab > SQL editor

On the left side you can choose the database, the schema and the table.
Database Local DWH is the database you want to use. Use the Public schema and select one of the tables. You can choose between local_dwhmessage, local_dwhmessage_key_value and local_dwhmessage_key_value_plus.

The preview of the data is something you are not able to export. You still need to write your own query before you can export data from the database. You can limit the number of records (with a max of 100 000 records at once). After running your query, the button DOWNLOAD TO CSV will become available.
Remark: you can save your query by clicking on SAVE AS. With a proper name and description you can easily find the query back in you home or under SQL LAB > Saved Queries.

Query examples
With the following information, you will be able to link multiple tables with eachother.
local_dwhmessage_key_value column msg_document_id refer to the document_id of local_dwhmessage.
local_dwhmessage_key_value_plus column key_value_id refer to the id of local_dwhmessage_key_value.
Query 1: Get all registrations from Orthopride Knee resection from the last 15 days.
SELECT * from local_dwhmessage WHERE data_collection_name = 'OP_KNEE_RESEC' and created_on > current_date - interval '15' day;Query 2: Get all registrations and key value from Orthopride Knee resection.
SELECT * from local_dwhmessage as ldm left join local_dwhmessage_key_value as ldmkv on ldmkv.msg_document_id = ldm.document_id WHERE data_collection_name = 'OP_KNEE_RESEC';Query 3: Get all registrations, key value and key value plus from Orthopride Knee resection.
SELECT * from local_dwhmessage as ldm left join local_dwhmessage_key_value as ldmkv on ldmkv.msg_document_id = ldm.document_id left join local_dwhmessage_key_value_plus as ldmkvp on ldmkvp.key_value_id = ldmkv.id WHERE data_collection_name = 'OP_KNEE_RESEC';