HD-DWH (Data warehouse of healthdata.be)
HD-DWH (Data warehouse of healthdata.be) manager Mon, 06/30/2025 - 09:36General description of the data warehouse at healthdata.be
General description of the data warehouse at healthdata.beThe submitted data from healthcare organizations are after pseudonymisation by the TTP (Trusted Third Party), and approval, correction and annotation steps by the dedicated teams, collected and stored in the data warehouse of healthdata.be.
Data analysis and reporting of the aggregated data from the data warehouse is made possible for authorized people.
Position of the DWH in the HD architecture
Position of the DWH in the HD architecture
Access to the validation/analysis envirionment of the DWH
Access to the validation/analysis envirionment of the DWH gaetan.muyldermans Tue, 11/04/2025 - 09:52User roles
User rolesFor each registry, the registry coordinator is, as default, assigned as Access Manager who is managing the access rights to the DWH applications (In future a HD Entity Access Management (EAM) LIKE system to be foreseen).
In this process, access requests are analyzed, validated if legitimate and approved. The registry coordinator should consult their Data Protection Officer (DPO) for more in-depth information concerning the grating of access rights.
Two data user roles are distinguished:
- Data validator
- should only access the DWH validation environment with the purpose of data validation. Analytical tasks are explicitly prohibited in the validation environment.
- Access is limited to two individuals per registry, a primary and a backup
- Data analyst
- should only access data in the DWH analysis environment with the purpose of data analysis
- Multiple data users might request access to this analysis environment
Note: It is acknowledged that, in some cases, the same individual may serve in both roles: Data validator and Data analyst. These roles will be supported by separate accounts with distinct access rights.
Request access
Request accessA user request is requested via a ticket of type ‘Request Access’ by completing the application form via the service portal: Jira Service Management (JSM) portal.
If the requestor is the registry coordinator or head of the service, we can consider this request as approved. In case the requestor is not the registry coordinator, an approval should be received from the registry coordinator/access manager for the requested roles
Note: access request to the validation environment can only be approved for max 2 data validators per registry.
Credentials will be generated by the DWH team and provided to the Data Validator/Data Analyst by the SD team before closing the SD (service desk) ticket.
Secure Processing Environment export request of aggregated data
Secure Processing Environment export request of aggregated dataThe Secure Processing Environment export request of aggregated data process enables data analysts to request data exports from the Secure Processing Environment (SPE), which are made available as secure download links.
This process is applicable for the export of aggregated data only. It is prohibited to export non-aggregated data from the SPE. In cases where the use of non-aggregated data is authorised, a specific process must be followed (see Exceptions to the SPE export requirements).
1. SPE export request roles
- Data validator (aka data manager): individual who is granted access to the HD DWH (healthdata.be Data Warehouse) validation environment in order to validate the data received at DWH.
- Data analyst (aka researcher): individual who is granted access to the HD DWH analysis environment in order to perform analysis on the validated data. The data analyst is also responsible for requesting data exports from the SPE. Each SPE export must fulfill the automated checks (see SPE export request of aggregated data process). After that there are 2 types of provisioning SPE exports:
- Automatic export: each export request is automatically scheduled for export. The automatic export is assigned to the majority of data analysts. Non-compliance to SPE export requirements, GDPR training,… may result in a reversal to the validated export type.
- Validated export: each export is verified by the data governance officer. Some data analysts are assigned to the validated export (new employees, trainees, specific request,…)
- Single Point Of Contact (SPOC) data governance: Each department has 1-2 SPOCs that can be contacted regarding general data governance topics. Contact details are provided/updated by the head of department to healthdata.be (HD) via a Jira Service Management ticket (JSM - https://healthdatabe.atlassian.net/servicedesk/customer/portals).
Responsibilities of the SPOC related to HD SPE:
- Share all information and communication related to the HD SPE with colleagues within the department
- Maintain the list of users within his department who can request SPE exports (automatic or validated) and to communicate any changes to HD via JSM.
- Data governance officer: the data governance officer is a team member of the HD data governance team.
- The data governance officer is responsible for the verification/validation of SPE export requests from data analysts assigned to the validated export.
- The data governance officer also performs retroactive checks on SPE automatic exports. In case of issues, the data governance officer contacts the data analyst and might request a new export.
- Data publisher: This role is specific to export requests made from the bunker environment. Since the data analyst is not known within the bunker environment, a data publisher (max. 2 per bunker) should be appointed by the client or the SPOC. The data publisher is responsible to verify the content of the export request made by the data analyst and is the recipient of the export request e-mail.
2. Disclaimer on Responsibilities, Monitoring and Data Exports
- Prohibition of data exports from the validation environment
Exporting data from the validation environment is strictly prohibited. Under no circumstances may data validators initiate, perform, simulate, or facilitate data exports from this environment. No exported data, files, screenshots, or derivative content may originate from the validation environment.
- Authorised export requests
Only authorised data analysts operating within the analysis environment are permitted to submit data export requests. All exports must be requested exclusively through the official and approved export request procedure. Any alternative method of data extraction or transfer is strictly forbidden.
- Data analyst responsibility and compliance obligations
The guidelines described herein outline key expectations governing data exports from the SPE. However, they do not constitute an exhaustive description of all technical, organizational, or procedural controls in place. Data analysts retain full responsibility for ensuring that all requested exports comply with applicable data protection legislation, ethical approvals, contractual obligations, and healthdata.be data governance policies.
- Monitoring, auditing and traceability
All export requests initiated by data analysts are subject to the following controls:
- comprehensive auditing and logging, including requester identity and relevant metadata.
- secure archiving to ensure full traceability and accountability.
- verification and review in accordance with healthdata.be data governance and privacy policies.
- Enforcement and accountability
In the event of a violation of export rules or applicable policies, the responsible data analyst can be identified through the audit trail. Sciensano/HD reserves the right to take appropriate corrective and enforcement measures, which may include suspension of access rights, reporting to relevant authorities in case of data breaches, or other actions as permitted by law and governance frameworks.
- No limitation of oversight
Nothing in this disclaimer limits the right of HD to implement additional monitoring, controls, or reviews, nor does it waive any legal, regulatory, or contractual obligations applicable to users of the SPE.
3. SPE export request of aggregated data process

Two configurations are offered within the SPE:
- SAS Enterprise Guide (EG) combined with Microsoft Edge/Google Chrome
- Dedicated virtual machines (VMs) with custom application sets (Bunkers)
3.1. SAS environment
- Data analysts having access to the analysis environment prepare aggregated data in the SPE and save the file in the SAS work directory, e.g. my_file.csv. Different types of files can be exported: PDF, xls workbook, htlm pages, csv, SAS table,…
- Data analysts execute the %request_file_export() macro with the name of the file to be exported as an argument (e.g., %request_file_export(my_file.csv);). The argument can also refer to a table available in the data analyst’s environment (e.g., %request_file_export(mydb2lib.my_table)).
- The export macro requires an accompanying valid metadata file (e.g. my_file.csv.meta) (see Metadata file requirements).
- The macro performs a serie of checks before the request is submitted (automated checks):
- The requesting data analyst does not have access to the validation environment.
- The file to be exported exists.
- The metadata file exists.
- The metadata file is not empty.
- The metadata file contains a ”tx_reg_nam” entry and its value is valid.
- Export request is either
- accepted automatically (automatic export).
- accepted or rejected after verification of the files to be exported (e.g. aggregated data, compliance to the “rule of 5”, metadata file,…) (validated export).
- Batch scheduled exports run every day at 10:00, 12:00, 14:00, 16:00, 18:00 and 20:00. It checks the status of the export request (accepted vs rejected):
- If the export request has been accepted, the data analyst who made the request receives an e-mail with a download link for his/her file(s) (available 30 days).

- If the export request has been rejected, the data analyst does not receive an e-mail. The reason for rejection is available in data analyst’s environment (see below).
- Once the request has been submitted, the data analyst can view its status in the CONTROL.V_FILE_EXPORT view available in his/her environment.


- ID_FILE_EXPORT: unique ID of the export request
- TX_FILE_NAM: name of the file to be exported
- TX_USR_NAM: export requester
- CD_EXEC: execution status of the request:
- 0 = new export request
- 1 = file not sent (error messages in log)
- 2 = request fulfilled
- 5 = request archived
- 9 = request cancelled by HD
- FL_VALID_BY_HD: validation status of the export request:
- <null> = validation is pending
- 0 = export request is rejected
- 1 = export request is accepted
- TX_COMMENT_BY_HD: Comments provided by the data governance officer. The reason why an export request is rejected is required and provided in this comment field.
- DT_REGISTRATION: date at which the export request was registered.
- DT_DONE: date at which the export request was processed.
- TX_CONTENT: code generated by the macro.
- TX_METADATA: code generated by the macro.
3.2. Bunker environment
The process is identical to that described for the SAS environment except that:
- The export request is initiated by placing the export file and its accompanying metadata file in an agreed upon export directory on the bunker server. This is done by the data publisher.
- The data publisher is also responsible to first review the export request made by the data analyst.
- The metadata for a <filename<.extension>> file must be called <filename<.extension>>.meta
- Only the data publisher receives the download link. He can then share it with the data analyst who made the request.
4. Requirements for SPE export requests
Any data export request from the HD SPE must fulfill the below described mandatory requirements:
- Only aggregated data can be exported.
- The “rule of 5” should be applied for calculated values.
- Export description should be provided via a metadata file.
4.1. Data file requirements
4.1.1. Aggregated data
The SPE export process described in this document is only applicable for the export of aggregated data from the analysis environment. Export of non-aggregated data if allowed, follows a specific procedure (see Exceptions to the SPE export requirements).
4.1.2. Minimum cell count rule (“rule of 5”)
Values calculated on small populations (n < 5) carry a higher risk of unintentionally revealing identifiable information. To protect patient privacy and minimize the risk of re-identification, all aggregated data exports must comply with the “rule of 5”:
- Any calculated value must be based on 5 or more distinct records.
- If a calculated value is based on less than 5 individual records, it must either:
- not be exported, or
- be suppressed or flagged as "< 5” in the output to indicate insufficient sample size.
- This rule applies to averages (e.g. mean age, average BMI), ratios and percentages (e.g., % smokers), statistical summaries (e.g. standard deviations), any other derived or computed metric,…
It is therefore mandatory to always include a "count" or "n" field to indicate the number of observations used in the calculation, in addition to the total count (N) applicable for the calculated variable.
Examples:

Attention points
The “rule of 5” applies as well to values not necessarily lower than 5: as soon as it is possible to conclude that there are less than 5 patients involved, the values should be replaced in line with the “rule of 5”.
Examples:
- If absolute numbers are replaced by “< 5” in your dataset, ensure that all other deviated fields are also replaced by “< 5” or “Not calculated” (NC) in these deviated fields. For example, if two calculated values need to be added and they are respectively listed as 16 and “< 5”, the sum of both should never be an absolute number, but is expected to be listed as “NC” or, if preferred, as “< 21” (using max n = 5).

- If the aggregated data are grouped per age category for example, and one of the categories does not contain 5 or more individual records, make sure that all data in the dataset pertaining to that age category are excluded from the export or listed as “< 5”.
Note:
Data governance is also looking into acquiring methodological expertise to help assess the risk of reporting cells below 5 where disclosure control has evolved significantly in the last 10–15 years. The traditional “rule of 5” is a threshold rule. Modern disclosure control increasingly uses quantitative risk assessment methods that go beyond simple cell suppression — especially when working inside SPEs.
References:
4.2. Metadata file requirements
To ensure traceability, transparency, and compliance with privacy policies, every file export must be accompanied by a standardized metadata file. This allows the data governance officer to quickly understand the content and intent of the export, and intervene when necessary.
The metadata file:
- must be included in the same directory as the file to be exported (SAS work directory).
- should be named: <filename.extension>.meta (e.g. my_file.csv.meta to go along with my_file.csv).
- must include following required columns:
- Key*: A short identifier or field code (e.g. tx_export_reason, year, A11).
- Description: A clear, human-readable explanation of the key.
* Mandatory keys per export

Example metadata file:
- "key";"description"
- "tx_export_reason";"Master thesis on Acute Coronary Syndrome: overview of cardiac symptoms per year"
- "tx_reg_nam";"INTEGO"
- "year";"Year of registration (2003–2022)"
- "A11";"Absolute number of registrations and incidence (ICPC-2 code A11)"
Important notes:
- Register name (tx_reg_nam) must be an exact match with a register to which the requester has access (cross-checked with values in the requester’s CONTROL.FILE_SPEC_* tables).
- Descriptions must be present for each key and must be specific and clear.
- Multiple file names can be added in the same metadata file with the included mandatory keys.
- Metadata is automatically recorded in the SPE Input/Output (I/O) monitoring system for auditing.
Creating a metadata file in SAS:
A sample SAS code is available in the TeamShare directory. It includes 2 examples of how files and metadata files can be generated and exported (a SAS table or a PDF report).
The macro accepts two optional keyword arguments:
- meta_file=: the name of the accompanying metadata file for the file to be exported. If the argument is omitted or left blank, the macro will look for a file with the same name as the one to be exported with an additional .meta extension (e.g., my_file.csv.meta). Note that this value can also be a reference to a table available in the SAS session. The requirements for the contents and structure of that table are the same as in CSV format.
- workdir=: the directory where the files are stored. If the argument is omitted or left blank, this defaults to the current session’s WORK directory.
Examples:
Different types of files can be exported: PDF, xls workbook, htlm pages, csv, SAS table,…

4.3. Exceptions to the SPE export requirements
SPE export requests deviating from the export requirements (e.g. non-aggregated data, non-compliance to the ‘rule of 5’,…) are not allowed and should not follow the process described in this document.
In case any specific requests are needed, the data analyst is required to inform the HD data governance team at least two days upfront by e-mail to datagov.healthdata@sciensano.be and provide any supporting document (e.g. agreement with the federal/regional authorities, ISC mandate, Data Protection Impact Assessment (DPIA),…).
5. Handling of SPE export request issues
Any issues encountered with the SPE export request (e.g. issues with the macro, the frequency, the metadata file,…) should be raised via JSM (https://healthdatabe.atlassian.net/servicedesk/customer/portals), with ‘SPE / Export: <Your topic>’ as subject.
Azure Virtual Desktop (AVD) for Data users
Azure Virtual Desktop (AVD) for Data users gaetan.muyldermans Tue, 11/04/2025 - 09:52Installation of the AVD
Installation of the AVD1. Installation of the Windows app
In order to access the AVD for the first time, data users should install the AVD environment locally.
Open the Windows app via following link
Log in with your <firstname.lastname>@healthdata365.be account
Important Note for users who have worked with Citrix in the past.
Your <firstname.lastname>@healthdata365.be password is the same as your Citrix account password.

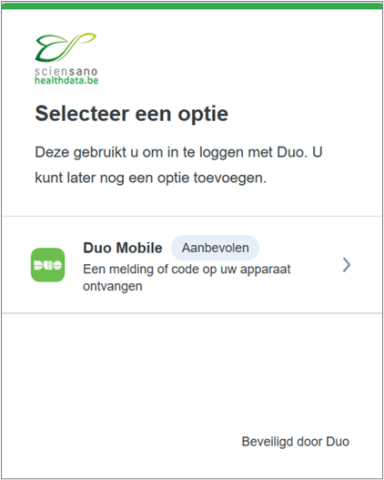
A pop-up appears to configure DUO (two factor authentication service)for your healthdata365.be account.
Since the Azure Virtual Desktop works with the Duo Security's two-factor authentication service of Duo Mobile to make logins more secure, it necessitate the installation of the DUO app on your mobile, tablet or smart watch. The application generates passcodes for login and can receive push notifications for easy, one-tap authentication on your mobile.
2. Install the DUO app on your mobile
As described in the section above, the DUO app necessitates its installation on you mobile as described below.
Download the app to your mobile device via the Apple Store or Play Store (Android)

On your mobile phone press on “+Add” in the right corner → “Use QR code”

Select Continue

3. Configure DUO
Select "Next" a number of times

Open the section "Recommended"
Provide your mobile phone number

Verify the entered number and confirm by selecting "Yes, that it is correct"

A QR code will appear on the next screen, leave it open until you have scanned it with your DUO application on your mobile phone.
SAS connection profiles
SAS connection profiles- Select the “AVD Research” workspace in the “Windows App”

2. Open SAS Enterprise Guide

3. Once SAS Enterprise Guide is open, go to the “Tools” menu at the top of the screen and select "Connections" from the dropdown menu

4. In order to add a new connection profile next to the ones already configured and listed in "servers", click on the "Add" button.

This will open the "Create Profile" wizard.

5. Complete the "Create Profile" wizard based on following information:
- Name: Enter a descriptive name for the server connection.
- Description: description of the server connection. Optional.
- SAS Server: Select Remote and fill in:
- metaaccint with port 8564 for the Acceptance environment.
- metaprdint with port 8563 for the Production environment.
- Save login in profile: You can check this one.
- Keep “Set Proxy list for metadata server” and “use Integrated Windows Authentication” unchecked.
- User: Fill in the same username you used to log into Citrix.
- firstname.lastname for the validation environment.
- firstname.lastname_a for the analysis environment.
Note: If the full name exceeds the allowed length, the first name is shortened to its initial to save space. Be sure to carefully check the email containing your credentials for the correct format.
- Password: Fill in the same password you used to log into Citrix.
- "Authentication domain”: to be ignored.
save the new profile by clicking on the "Save and connect" button
6. Start using the server
You’re all set! You can now begin using SAS functionalities provided by the server in your SAS Enterprise Guide projects.